FE Workforce Data Collection and Export
FE Workforce data can now be entered against personnel in Maytas and exported to an XML file for submission to the ESFA.
The FE Workforce features are a chargeable module which requires a new licence to be installed. Please contact your account manager for information on purchasing the module.
Workforce Permissions
Permissions must be set to enable Workforce features for a user:
- Go to Tools | Edit Permissions.
- Select the user or group which requires permission.
- On the Modules tab, set FE Workforce Data Collection to Visible
- Go to the Commands tab and expand the FEW Collection section.
- There are permissions for deleting, generating, outputting, saving, validating and viewing FEW data. Set each permission to Visible as required.
- Click Apply and restart Maytas for the changes to take effect.
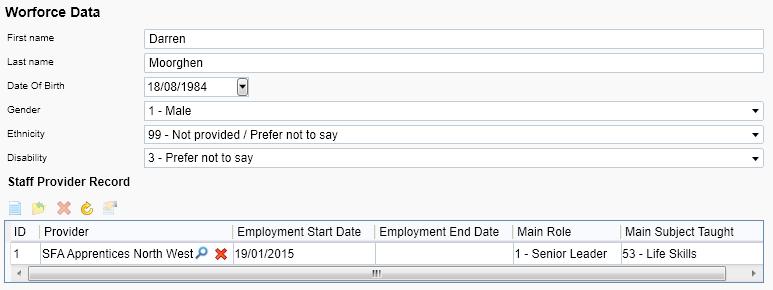
Data Entry
To enter Workforce data against a personnel record:
- Search for and open the personnel record in Maytas.
-
Go to the Workforce Data tab.
-
Complete the data as required, then click the
 button on the grid to add a new staff provider record.
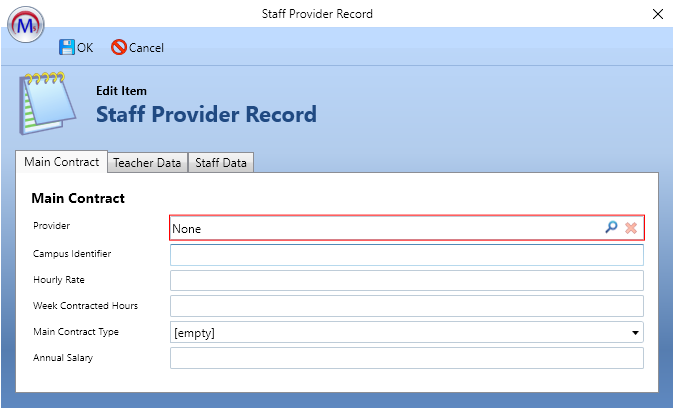
-
Complete the Main Contract, Teacher Data and Staff Data tabs as required.
For the Provider field, click the
 button at the end of the row to search for and select one of the available entries, which come from the Contractor table.
 - Click OK when finished.
- Click Apply to save changes.
Workforce Export
To export Workforce data:
-
Go to Exports | FEW Export.
-
Click the
button to generate a new export.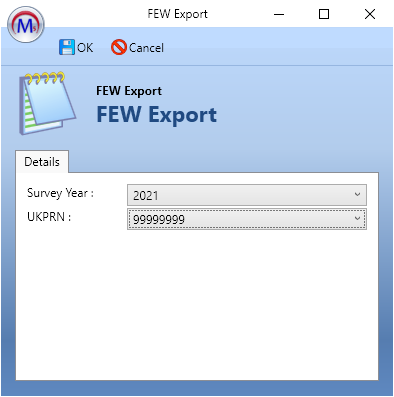
-
Select the Survey Year and UKPRN to generate the export for.
The available UKPRN values are taken from the CONTRACTOR.UKPRN20 field, as the FEW export is currently limited to the 2020/21 format. This will be updated to use UKPRN21 when the FEW 2021/22 format is released.
- Click OK.
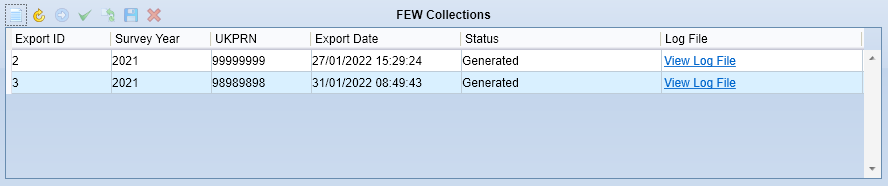
- A new row will be added to the grid. When the export has finished, the status will display Generated.
- To validate the export, select it in the grid and click the
 button on the grid tools. Validation errors will be displayed in the lower half of the screen.
 - To output the export to an XML file, click the
 button on the grid tools. The file will be sent to the same folder where ILR exports are output to, which is determined by the configuration option at Maytas 5 | ILR Export | The output directory for ILR export files. If the configuration option is not present, files are sent to C:\temp.
 - Once the XML file has been output, you can choose to save a copy at a location of your choice by clicking the
 button on the grid tools.
 - Additionally, you can use the
 button to regenerate an export and the
  button to delete an export (note that this deletes the export from the database - it does not delete any saved XML outputs of the export).